Day 17 :: All About Legs

This is Day 17 of the 31 Days of Amigurumi. This 31 day series is full of how-to's for designing and creating your very own amigurumi. Whether you're a beginner at ami's or just need help on a certain technique, there's something here for everyone.

31 Days of Amigurumi is the place to learn all about creating your own Amigurumi. 

When it comes to amigurumi, legs can be as simple or as difficult as you make it! They can be a simple straight cylinder that you crochet straight off the body, maybe they can have a nice taper so they get thinner at the ankles, or they even be a crazy shape to help mimic joints of an animal. Whatever you choose to do is fine, but lets talk about how they can be attached!

Split Body Legs

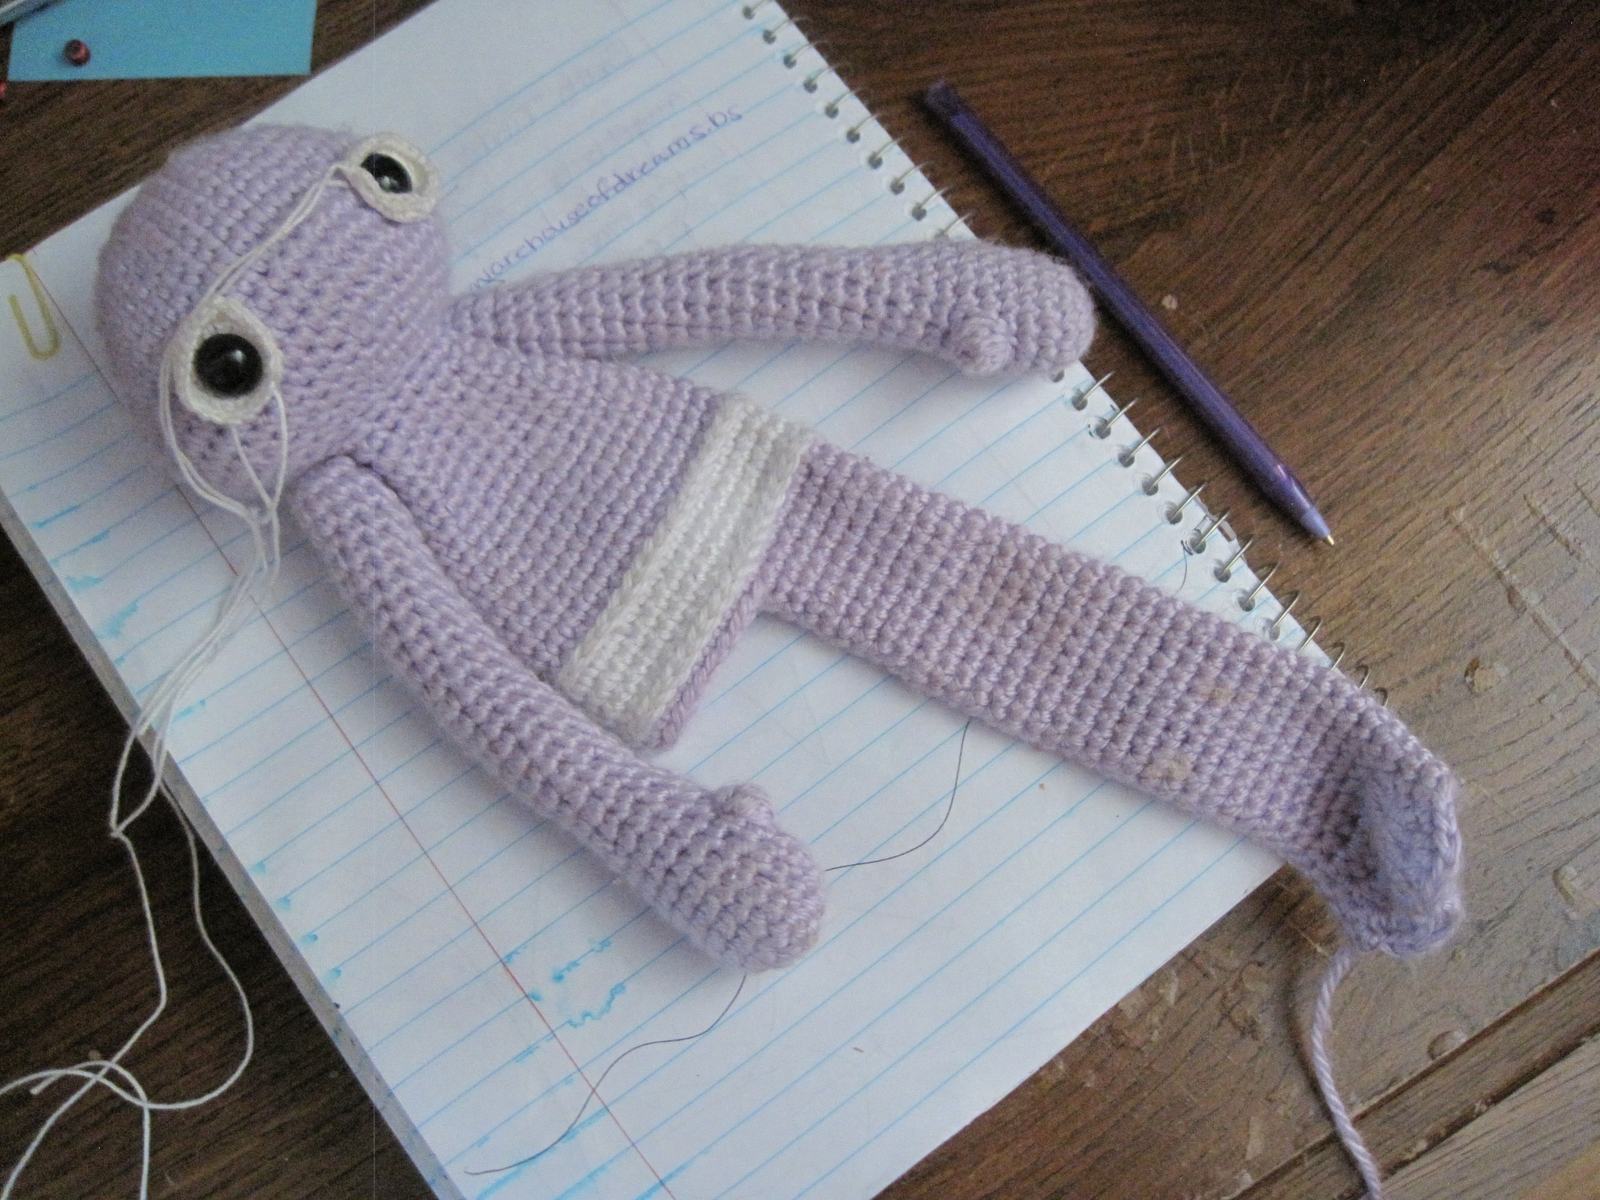
I know this sounds weird, but one of my favorite ways to create my legs is crochet the body, then split the number of stitches in half and continue stitching in the round to create the leg. This is probably the simplest way to attach the legs and it's more of an all-in-one or top-down approach. The pros is that the legs will never fall off and they flow seamlessly from the body. The cons are that you don't get ANY mobility in the joints. I generally can't even sit my dolls down with this technique, but you have to decide if that works for your project.


Separate Legs

You can always make your legs separately and sew them on in a few different ways. Whether you sew them to the openings that your body creates or you sew them on another way, this is a great technique for non humanoid creations.

In this example I sewed the legs inside the opening and sewed the opening flat. This way the legs can bend back and forth and still allow for some sitting positions.


Creating a Rotating Joint

Joints aren't used as often but definitely serve a purpose. If you want your doll's legs to be easily pose-able then joints are the way to go. With joints you can rotate the legs at the hips and sit them down easily. If you create more joints in the legs then you can pose your creation to the max.

In this old doll pattern that I made I sewed the finished legs to the finished body and the legs could move in all directions. You can either sew them in, use a doll joint, or even use a simple safety eye as your joint to allow it full rotation.


How do you create amigurumi legs?

Legs come in so many different possibilities. A human shaped leg is more of a straight up and down shape, but there are several ways you can accomplish that depending on the look. Sometimes you might want to make it literally like a straight tube, but you could also taper it down, or give it a more realistic shape to accommodate a knee and ankle.

Straight Legs

This is exactly what it sounds like. However many stitches you have in the round, you just continue to crochet with that many stitches until you've reached the length you want for your leg. No matter if you're working form the hip-down or from the ankle-up, it's all the same.

Tapered Legs

I personally like this look because it gives the leg a slight feminine and whimsical feel. Since I usually work my doll from the hip-down then I will give some simple directions from that angle, but it can be worked in reverse too. Basically, I work a few rows with the original number of stitches I have. Once I decide I want it to taper down a little I work one decrease on the outside edge of the leg. Then I repeat, single crocheting a few more rounds and then work a decrease on the outside edge when I want it to decrease. How often you decrease depends on how gradual you want the taper to be. Making your own dolls can sometimes be a lot of trial and error until you reach your desired shape, so just play around.


Realistic Shapes

This is not something that I usually fool with, but I have seen some beautiful dolls made with a more realistic shape to them. It's all a matter of the look you're going for. Creating a more realistic leg is all about tapering in the right places to achieve the look you want. You would taper it down to the knee, then open it back up a little for the calf before tapering it back down again for the ankle. I hope that makes sense, but it's all a matter of trial and error, again, to create the desired shape.

This image is used for demonstration purposes only.
©Knitting Doll Factory

Ok, I hope that was helpful to you and that you understand amigurumi legs for humanoid shapes a little better. Next we'll be talking about all about feet, so don't miss that one! Thanks for stopping by and be sure to check out the other posts in the amigurumi series.

What type of legs do you like to create?


Happy crocheting,
~Chassity O.

Day 16 :: Attaching Separate Heads

This is Day 16 of the 31 Days of Amigurumi. This 31 day series is full of how-to's for designing and creating your very own amigurumi. Whether you're a beginner at ami's or just need help on a certain technique, there's something here for everyone.

31 Days of Amigurumi is the place to learn all about creating your own Amigurumi. 

One of the biggest problems I faced when I first started crocheting amigurumi was sewing the head to the body. I tried to avoid it as much as possible by making all my ami's in the top down crochet method. Often the seams showed too much and then it ended up being floppy like a rag doll. It definitely was not the look I was going for.

After awhile I decided to look into it, as well as practice, and it got easier with some tricks I learned.


Using The Post Method

I like to sew my pieces together by going around the posts of the rows you are sewing together. My video will help to show this better, but this could be used even if you are sewing two unmatched rows or even sewing a ball to the side of your work. Imagine the posts or even rows as anchors for the yarn you're using to draw the two pieces together. It doesn't matter if they match up then, they just hold it all together.

Using The Stitch Method

If you happen to have two open ends to sew together, the stitch method works well too. If your pieces both have the same number of stitches then matching those stitches up and sewing them together in a round and around loop is simple. I also showed this method in my video and I hope it's helpful!

Stuffing is key! 

Not only is it crucial to have the right amount of stuffing in both the head and the body you're attaching it to, but adding extra stuffing to the neck before completely closing it up is important. There tends to be a gap in the neck from pushing the polyfil all the way into the head and/or body and filling the gap with extra stuffing helps to fix that problem.

Extra Tip

Make sure that when you're sewing the two pieces together that you use the same color. If you're pieces are two different colors then no problem, just use one of the colors from one of the pieces. In my opinion, using the post method will help to hide the string used to sew them together.


So I hope that was helpful! I've come to enjoy sewing the pieces together and I hope this post made it easier for you! Stay tuned for more posts to come. Next we will talk all about legs and different ways to make them!

Happy crocheting,
~Chassity O.

Day 15 :: Top Down Crochet

This is Day 15 of the 31 Days of Amigurumi. This 31 day series is full of how-to's for designing and creating your very own amigurumi. Whether you're a beginner at ami's or just need help on a certain technique, there's something here for everyone.

31 Days of Amigurumi is the place to learn all about creating your own Amigurumi. 

When it comes to creating your very own amigurumi, you get to choose just how you want it to be crocheted. There can be some advantages, and even disadvantages, to creating an amigurumi that is crocheted from top to bottom in one piece. It would basically be one piece of work from head to foot. Today I'm only going to be talking about crocheting the head and the body in one piece.


If you're making a humanoid doll, you would basically crochet the head first. Without closing it you would then continue to crochet the body. This is the way I prefer to crochet my dolls, without a neck seam. I love the way it looks and I don't have to worry much about it coming apart.

Here are the pros and cons of crocheting this way.

Pros:
• It's really easy to crochet it all in one piece.
• You won't have to sew it together or or weave in ends.
• It makes for a durable doll, better for children.
• It gives a nice and complete look.
• It saves  you some yarn without all the ends or sewing together.

Cons:
• It's limiting as to what you can crochet with this technique. It only works for straight up and down designs, like humanoids.
• Body parts don't move or rotate as easily for posing.

You'll have to decide if a top down approach is something that will work for your project or if you want to do certain pieces separately based on your design.

Here are some patterns with top down crochet as an example.
Little Baby by Akina Stisu
Doll in Bear Hoodie by Tracey MacIntyre
Artistic Annie Doll at Red Heart
Gema, Kokechi by Teresa Alvarez
Brobee by craftyjapanese

I hope this info helped you some. Top-down crochet is my preferred method of crocheting, though I know it doesn't always make sense for certain projects. The next post is going to all about sewing the head to your ami!

Happy crocheting,
~Chassity O.

Day 14 :: Closing Up Holes

This is Day 14 of the 31 Days of Amigurumi. This 31 day series is full of how-to's for designing and creating your very own amigurumi. Whether you're a beginner at ami's or just need help on a certain technique, there's something here for everyone.

31 Days of Amigurumi is the place to learn all about creating your own Amigurumi. 

When it comes to closing up holes there really is no hard rule for how it's done. There is one technique that seems to work best for me. Here is a video from youtube, but I should let you know that this is not my video.


  • You can choose to go inside to outside, like shown in the video, or outside to inside. Personally, I do outside to inside for a nice seamless finish.
  • Use your tapestry needle and your yarn tail to weave the end shut.
  • Use the front loops only to gather up the outside layer of the work and make it close up neatly.
  • Weave the end down into the ball to make the end lay flat.
I hope this little post helped you. Check back tomorrow for my pros and cons of crocheting all in one piece, or what I call top-down crochet!

Happy crocheting,
~Chassity O.

Day 13 :: Properly Stuffing Your Amigurumi

This is Day 13 of the 31 Days of Amigurumi. This 31 day series is full of how-to's for designing and creating your very own amigurumi. Whether you're a beginner at ami's or just need help on a certain technique, there's something here for everyone.

31 Days of Amigurumi is the place to learn all about creating your own Amigurumi. 

Putting stuffing in your amigurumi is pretty much essential! It wouldn't be an amigurumi if it wasn't stuffed, right? There is one common mistake that we make as beginners, and that's not adding enough stuffing! There one a little rule that I learned early on, and it's this...

Once you think you've added enough stuffing, add some more!

We often believe that there's too much stuffing, but it isn't really. You want to stuff that baby up until the surface feels stiff, but not to the point where the stuffing is coming out between the posts. This is where your tight stitches comes in to play. Here are some tips and tricks I've used when stuffing.

Stuff As You Go

When it comes to stuffing, it's often helpful to stuff along the way! I don't like to stuff it too much as I'm working because I hate when the stuffing gets in my way, but I often like to stuff it a little before the hole gets too small. Once you get down to the last row that hole is often so small that you can only add small amounts of stuffing at a time, making it take forever. Adding a little before it's too small can help speed up the process.

Use a Pen or Pencil to Help You

While a bag of polyester fiberfill often comes with a wooden stick for this reason, I like to use a writing utensil to help me stuff the stuffing in there. Here is the reason why! I find the width of pens and pencils to be the same as that tiny hole at the end of my projects! Also, the flat end of a pen or even the rubber of the eraser helps to grip the fibers and push them inside the hole.

Roll It in Your Hands

Once I've stuffed a bunch of stuffing inside the work, I've noticed that it can start to look lumpy and bumpy (yup, that's a technical term) as the fibers start to ball together. I put the work between my hands and roll it around. Don't be afraid to push it and shape it to get a nice smooth exterior.

Feel For Empty Spots

Once you've been stuffing it up and rolling it around for a nice shape you'll want to push in different spots to feel for any dips and holes in the stuffing. Sometimes you can see them from the shape it's creating, but other times you can feel them under your fingers. Once you find one you can push your stuffing around with your pen or pencil to fill the hole and then stick some more stuffing in there to compensate.

Pay Attention to Your Shape

You want to make sure that your stuffing isn't compromising the shape that you are trying to create. Every time you put some more stuffing in there then check the shape you've made to make sure it looks the way you want it to. The stuffing should be helping you to hold up the shape you've just worked so hard to crochet, not destroying it.

Stuff it to High Heaven

I know I've already said this, but I just have to reiterate it! Once you think you've put enough stuffing in it, stuff it up some more! Just keep stuffing until the stuffing is starting to stick out of the hole. You don't want the stitches to be spreading out, but you want it to feel stiff on the outside. Trust me, it's still going to be nice and soft.

The Exception to The Rule

Of course there is an exception to every rule. So there is no rule saying that you MUST stuff every piece of your ami! There are times when no stuffing, or less stuffing is called for. For my free fashion doll pattern I do not stuff the arms, and that's because I wanted them to move easily. Often times there are ears that are left unstuffed in order to flatten them out and give them a rounded look. Sometimes even a less stuffed ball can give you a more oval shape. It's all in your design, so as always just play around with it.


So that's all from me today! I hope that it made sense for you! We're not even half way yet, so keep coming back. Tomorrow we are going to be talking about closing those holes at the end of your crocheted shapes.

Happy crocheting,
~Chassity O.