So I got an email from a nice woman who gave me such rave reviews for my
Simple Fingerless Gloves Pattern. (Thank you so much by the way for that.) It turns out everyone is really in love with it and I'm very happy that everyone has found some great use for them. Anyway, the email was asking me how she could make these gloves for everyone in her family and that got me thinking. I realized that others could really use this info as well and so I set out to make them in more sizes and post them here for everyone to enjoy!
Now, let me start out by saying that these patterns haven't been tested beyond the people I have in my family (My daughter is the size of a 7/8 year old and my son is 2), so if you get an end result that doesn't match up to what has been written here or you find a mistake, then please let me know! :) You can either comment below or
send me an email. I love hearing from people reading this blog and using my patterns, so please feel free to write me or even send me pictures. I might even post those pictures on the blog (with your permission of course).
So, lets get this show on the road! I didn't make PDF files of these three this time, but I'm sure you can download the file from the women's pattern and jot down some notes. Let's start with the men's pattern.
Just like the
women's pattern, I used a
worsted weight acrylic yarn and an
H hook. the gauge ended up being about 16 hdc to equal 4 inches.
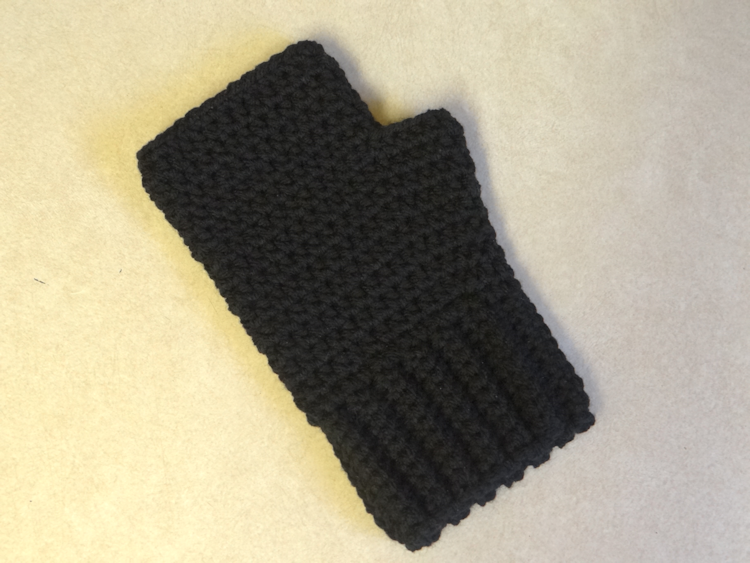
Men's Simple Fingerless Gloves
fits adult males
These patterns are worked continuously, making it easy to follow. It's just one simple pattern for both hands, so they are interchangeable! Make two.
Cuff
Ch 11
Rnd 1: sc in second ch from hook and in ch across, turn (10 sts)
Rnd 2: ch 1, sc in first sc, sc in back loops only of next 8 sc, sc in last sc, turn (10 sts)
Rnd 3-28: repeat rnd 2 (10 sts)
Slst or sc the two ends together to form a cuff. Begin the next round by crocheting along the edge of the cuff to start the hand portion of the glove.
Hand
Work in the round, joining at the end of every row and continuing in the same direction. The first stitch will always be in the same stitch as the join from the previous round.
Rnd 1: ch 1, sc 29 times along the edge, join to first sc (29 sts)
Rnd 2: ch 1, 2 hdc in first sc, hdc in each sc across, join to first hdc (30 sts)
Rnd 3: ch 1, hdc in each st around, join (30 sts)
Rnd 4: ch1, 2 hdc in first st, hdc in next 2 st, 2 hdc in next st, hdc in each st around, join (32 sts)
Rnd 5: ch 1, hdc in each st around, join (32 sts)
Rnd 6: ch 1, 2 hdc in first st, hdc in next 4 sts, 2 hdc in next st, hdc in each st around, join (34 sts)
Rnd 7: ch 1, hdc in each st around, join (34 sts)
Rnd 8: ch 1, 2 hdc in first st, hdc in next 7 sts, 2 hdc in next st, hdc in each st around, join (36 sts)
Rnd 9: ch 1, 2 hdc in first st, hdc in next 9 sts, 2 hdc in next st, hdc in each st around, join (38 sts)
Rnd 10: ch 1, hdc in first st, skip next 11 sts, hdc in next st and each st around, join
Rnd 11-14: ch1, hdc around, join
Rnd 15: ch 1, sc around, join
Fasten Off and weave in end.
Kids Simple Fingerless Gloves
should fit ages 5-12
Cuff
Ch 9
Rnd 1: sc in second ch from hook and in ch across, turn (8 sts)
Rnd 2: ch 1, sc in first sc, sc in back loops only of next 6 sc, sc in last sc, turn (8 sts)
Rnd 3-20: repeat rnd 2 (8 sts)
Slst or sc the two ends together to form a cuff. Begin the next round by crocheting along the edge of the cuff to start the hand portion of the glove.
Hand
Work in the round, joining at the end of every row and continuing in the same direction. The first stitch will always be in the same stitch as the join from the previous round.
Rnd 1: ch 1, sc 21 times along the edge, join to first sc (21 sts)
Rnd 2: ch 1, 2 hdc in first sc, hdc in each sc across, join to first hdc (22 sts)
Rnd 3: ch 1, hdc in each st around, join (22 sts)
Rnd 4: ch1, 2 hdc in first st, hdc in next 2 st, 2 hdc in next st, hdc in each st around, join (24 sts)
Rnd 5: ch 1, hdc in each st around, join (24 sts)
Rnd 6: ch 1, 2 hdc in first st, hdc in next 4 sts, 2 hdc in next st, hdc in each st around, join (26 sts)
Rnd 7: ch 1, hdc in first st, skip next 6 sts, hdc in next st and each st around, join (20 sts)
Rnd 8-10: ch1, hdc around, join
Rnd 11: ch 1, sc around, join
Fasten Off and weave in end.
Toddler Simple Fingerless Gloves
should fit ages 2-4

Now these munchkins tend to have short chunky hands, so this one is worked a little differently, which is why I decided to post it last in the lineup. :)
Cuff
Ch 7
Rnd 1: sc in second ch from hook and in ch across, turn (6 sts)
Rnd 2: ch 1, sc in first sc, sc in back loops only of next 4 sc, sc in last sc, turn (6 sts)
Rnd 3-24: repeat rnd 2 (6 sts)
Slst or sc the two ends together to form a cuff. Begin the next round by crocheting along the edge of the cuff to start the hand portion of the glove.
Hand
Work in the round, joining at the end of every row and continuing in the same direction. The first stitch will always be in the same stitch as the join from the previous round.
Rnd 1: ch 1, sc 25 times along the edge, join to first sc (25 sts)
Rnd 2: ch1, 2 hdc in first st, hdc in next 2 st, 2 hdc in next st, hdc in each st around, join (27 sts)
Rnd 3: ch 1, 2 hdc in first st, hdc in next 4 sts, 2 hdc in next st, hdc in each st around, join (29 sts)
Rnd 4: ch 1, hdc in each st around, join (29 sts)
Rnd 5: ch 1, hdc in first st, skip next 6 sts, hdc in next st and each st around, join (23 sts)
Rnd 6-7: ch1, hdc around, join
Rnd 8: ch 1, sc around, join
Fasten Off and weave in end.
ALL DONE! ENJOY YOUR SIMPLE FINGERLESS GLOVES FOR THE ENTIRE FAMILY!
I really hope you enjoy this pattern. If you need any help then please feel free to leave a comment or email me at twolittlecs@gmail.com.
TERMS :: You may sell whatever you make with my pattern, but please link back to my blog. Please DO NOT alter my pattern and repost it in any way, claiming it as your own.
Happy crocheting!
Chassity O.